Creating a Google Doc
Today we are going to learn how to create a document with our
Google Apps for Education accounts!

Google Apps for Education accounts!
Google Drive is the location where you will begin using the office suite applications in Google Apps. In Google Drive, you will find an easy-to-use word processor to create and edit written documents.
To create a document in your Google Drive account:
To create a document in your Google Drive account:
- Log in in to your Google Apps account from the Spurgeon web site so that you access your SAUSD Google account not another Google (gmail) account.
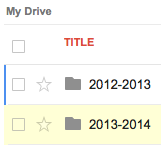
- Click on your 2013-2014 school year folder.

- Click the red "Create" button on the left side of your Drive account.
- Drop down to and click on "Document".
- Click on "Untitled Document" and type in the box to rename your document.
- Compose and edit your document as with any word processing software.
- Google Docs are automatically saved.
 | |
| Add Image Icon |
- Create a new document as detailed above.
- Rename the title to "About Me".
- Type your name at the top of the page.
- Click the "Align center" button to center your name as a title.
- Highlight your name and change the font to your choice, change the size to no larger than size 36, and change the "Text color" to your preference.
- Press return two times.

- Insert a photo of yourself by clicking on the insert menu item, and drop down to image.
- Click "Take a snapshot" to see the viewer.


- When you are happy with your photograph, click "Take snapshot".
- Move your photo to the bottom of your document.
- You may also add a photo of your favorite thing, but don't forget to cite your resource, it's easy to do if you use Google docs Reference tool.
- Great job!
posted by Ms. Kline @ 7:55 AM
0 comments
![]()


0 Comments:
Post a Comment
<< Home